Installing a Gear Vendors Overdrive Unit

I decided that I wanted to put overdrive in this Mustang.  I am running 4:11 gears but I wanted to still be able to cruise down the highway if I decide to take the car on a trip.  I looked into many options.  At first I was simply going to perform a t-5 swap, but after researching the t-5 they really weren't built for high torque applications, and to beef them up so that they could handle the torque was going to be rather expensive.  Next I looked into a TKO transmission, but by the time that I purchased all of the adapters needed to bolt it up to my car I would have had a lot of money into the project.  So I decided to go with a gear vendor unit.  I like the Gear Vendors unit because it maintains all of the stock parts and was the closest thing to a bolt in kit that I could find for the money.  Plus they are rated up to 1000 horsepower.  I also like the unit because it is not just an overdrive unit it is a gear splitter.  That means that you can split all of your gears so essentially I have turned my car into an 8 speed.  The following pictures show some highlights of the install.

Originally when I switched the car to a 4 speed I used a T-10.  Before I stopped running the car the T-10 began slipping out of 2nd & 3rd gear.  Upon inspection of the transmission I determined that those gears were rounded off and would need to be replaced.  Since it was about the same price to replace the gears as it was to buy a good Toploader, I decided to go with the Toploader because I feel it is a stronger transmission and if something does break on it the parts are more readily available.  The 1st step in installing a gear vendors unit is to remove to original tailshaft and install the Gear Vendors one.  Be sure to remove the speedometer gear from the output shaft before installing the new tailshaft.


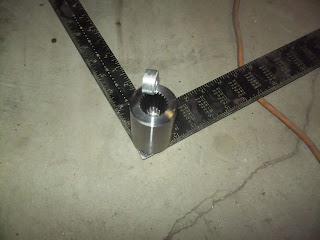
Next the output shaft adapter goes on.  Gear Vendors recommends .015" - .040" endplay  between the adapter and the overdrive unit.  To check this place a straight edge across the tailshaft and check the distance between the straight edge and the adapter.  Shims are included in the kit to move the adapter closer to the straight edge.
In my case there were not enough shims in the kit to get the endplay to specs.  I called Gear Vendors and they told me that they could send me more shims or I could just use washers as spacers.  I ended up cutting a piece of aluminum spacer that I had laying around.  It worked out great.

Next I installed the block plate.
Then the flywheel was installed.  The flywheel bolts were torqued down to 75 ft/lbs as per ARP specs.
If necessary you can clamp the flywheel to the block plate to keep the engine from turning while you tighten the flywheel bolts.  Be sure to use a clamp with soft jaws to ensure that you don't scratch the surface of the flywheel.  If you don't have a soft jaw clamp use a block of wood in between the clamp and the flywheel..

Next I inserted the clutch alignment tool through the splines in the clutch and into the pilot bushing.
The pressure plate goes on next.  The pressure plate bolts were coated with blue Loctite prior to installation.
Pressure plate bolts were then torqued to 35 ft/lbs
Once the bolts are torqued down the clutch alignment tool can be removed.


Next install the bellhousing.  Don't forget the clutch fork and throwout bearing.

Now lift the transmission into place and slide the input shaft through the clutch and into the pilot bushing.  It may be necessary to turn the motor over or twist the transmission in order to line up the splines.

Now bolt the transmission to the bellhousing and install the cross member.

Now bolt the Gear Vendor unit to the tailshaft and torque the bolts to 9 ft/lbs.  Then install the slip yoke that is supplied with the kit.  Now it is time to measure the driveshaft.   To get the proper measurement make sure the yoke is fully seated in the overdrive unit.  Then measure from the centerline of the u-joint on the differential to the centerline of the u-joint on the yoke.  Subtact 5/8" from your measurement.  This is the number that you need to give to your driveshaft shop.  Take your driveshaft and yoke to the shop and have them shorten and balance you driveshaft.

Then install the driveshaft.
After the driveshaft is installed fill the unit Dexron/Mercon transmission fluid. 

This is the electronics for the unit.  Everything is labeled and color coded which makes it really easy to hook up.

The unit is activated by a button on the shifter knob.  When you want overdrive you simply have to push the button.

No comments:

Post a Comment