Click here for great deals on Mustang cowl pieces!
As
is the
case with a lot of older Mustangs the cowl on this mustang is rotted
out. If you are looking for an older car to restore do yourself a favor
and find one that has a solid cowl. This is a major project that
requires drilling out hundreds of spot welds. As you can see in the
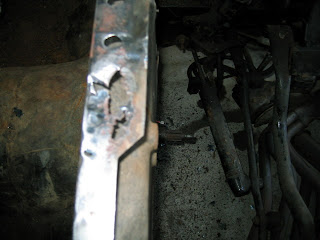
photos this cowl has extensive rust damage. Normally rust damage this
bad would cause floor rotting as well. Luckily I had the floors
replaced the 1st time that I restored this car so although they did get
some surface rust, there is no major rust issue with my floor. Please
look at the pictures of the steps that were taken to properly repair
this car's cowl area.
 |
| Before |
 |
| After |
 |
| Before |
 |
| After |
 |
| This is what the old cowl looked like after removing it from the car. |
 |
| After removing the cowl, the outer cowl side panels, and the inner cowl side panels rust was discovered on the rocker panel. The metal was cut out and a new piece was fabricated and welded in. |
 |
| This is what it looks like after the repair was completed. |
 |
| Here's another view of what it looked like when it was cut off of the donor car. |
 |
| Before |
The firewall and roof pillars also had some rust issues that had to be dealt with. The rusted pieces were removed and new pieces were fabricated and welded in. The welds were ground down making the repair invisible. The following pictures show the before and after shots of the repairs.
 |
| After |
 |
| Before |
 |
| After |
 |
| Before |
 |
| After |
 |
| Ready for reassembly |
 |
| The inner kick panels go in first. |
 |
| Holes were drilled/punched in the panel where it was to be welded and the panel was coated with a weld through primer. It was then fit into place and welded. |
 |
| Here is a view from inside the passenger compartment. |
 |
| The same process was used on the passenger's side. |
 |
| The inner kick panels are now in and its time to weld in the cowl. |
 |
| Before setting in the cowl remove the paint were welding will be performed. Then coat these areas with weld though primer. Don't forget the area where the inner kick panel gets welded to the underside of the cowl. |
 |
| Aligning the cowl is relatively easy, but be sure to take your time and do it correctly. Having the cowl misaligned will cause huge problems down the road. To align the cowl simply insert the bolts through the cowl and the firewall where the export brace attaches. If these four bolt holes are aligned you can guarantee that the cowl is centered left to right, and sitting in the correct position from front to back. Once the cowl is centered you can begin spot welding it into place. Start in the center and work your way around. In areas that the spot welder will not fit holes can be drilled and then plug welds can be performed. This method can also be used on the entire panel if a spot welder is not available. |
 |
| Here's what it looks like after the welding is completed. Don't forget to weld the tops of the inner kick panels to the bottom of the cowl. Be careful not to burn through the cowl. |
 |
| Once the cowl has been welded in move onto the side cowl panels. Again, remove any paint from areas that will be welded and coat them with weld through primer. Then either spot weld around the flanges or if a spot welder isn't available drill/punch holes in the side panel where a weld is desired and use a mig welder to create plug welds to attach the panel. |
 |
| Here's the completed repair |


No comments:
Post a Comment